
OST is an Outlook Data File that is created on your local system at a default location when you configure MS Outlook 2016 account. It allows you to access your mailbox when you’re offline. Usually, it is not required to change the location of OST file. However, sometimes, you need to change OST location in Outlook 2016, if the OST file becomes too large and there is lack of space on the hard drive partition or an Outlook account is removed.
If, in case, you want to change the location of OST file, read this article to learn about the ways to relocate the OST file in Outlook 2016.
Ways to Change OST File Location Outlook 2016
Following are some ways that can help you change the OST location:
1. Set ForceOSTPath
You can set ForceOSTPath to change OST file location Outlook 2016. However, before you do that, you must remove the Outlook account. You can add the account back to your Outlook profile after setting the key.
To set the ForceOSTPath in Outlook 2016, follow the given steps:
- Press Windows + R keys.
- When the Run dialog box opens, enter regedit in the search field, and click OK.
- Go to HKEY_CURRENT_USER/Software/Microsoft/Office/16.0/Outlook.
- Right-click on the Outlook folder. Select New and click Expandable String Value from the menu.
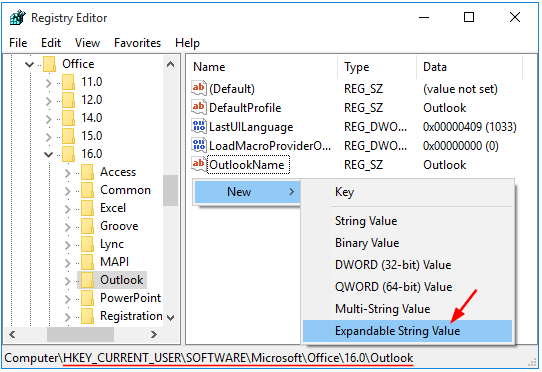
- Enter ForceOSTPath as the string value.
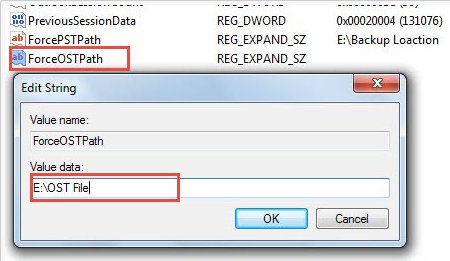
- Right-click ForceOSTPath and click Modify.
- Provide the new path for your OST file and click Enter.
2. Use Symbolic Links
Another way to change OST file location Outlook 2016 is to create a Symbolic Link. By doing this, you can repoint the OST file to another location. Follow the steps below:
- Close Outlook and move the OST file to a new location.
- Type cmd in Windows Search to open Command Prompt utility. Right-click on it and select Run as administrator.
- Enter the following command: mklink “C:\old-OST-path” “D:\New-OST-path”. Example: mklink %localappdata%\Microsoft\Outlook\<file name> “D:\Outlook Data Files\<file name>”
- Press Enter.
3. Recreate OST at a New Location
Since OST is an offline cache of your live mailbox, you can delete the file from your system and recreate OST file it at a new location.
To do so, follow the given steps:
Part 1: Locate the OST File
- Launch Outlook and go to File > Account Settings > Account Settings.
- In the Account Settings window, open Data Files tab. Select the OST file from the list and click Open File Location to find the file’s location.
- Move the OST file to the desired location.
Part 2: Set New OST File Location
- Launch Outlook and go to File > Account Settings > Account Settings.
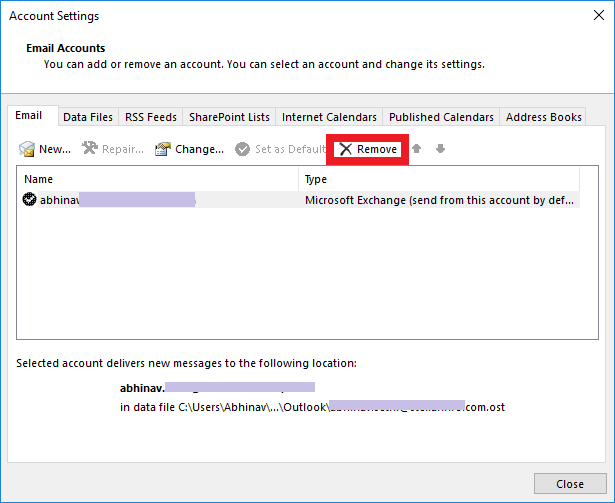
- In the Account Settings window, open Email tab, and then select Exchange email account.
- Click Remove and then click Yes.
- Click New.
- In the Outlook login window, enter your Outlook account credentials and set up your account once again.
- Once your account is set up, click Change, and click Next.
- In the Exchange Account Settings window, click More Settings.
- Open Advanced tab, and click Outlook Data File Settings.
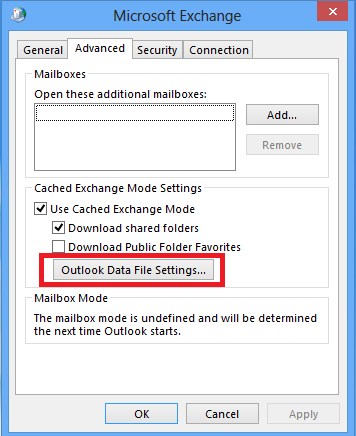
- In Outlook Data File Settings window, click Browse and provide the path to the new OST file location.
- Click Open to set the new location.
What to do if OST file is orphaned/inaccessible?
Changing the location of OST file is tricky. If you make a mistake while changing the location of OST, the file may become orphaned or inaccessible. OST can also become orphaned when you don’t have access to your live mailbox, or the Exchange server is offline. When OST is orphaned, you can’t access it in Outlook. If you don’t have access to your live mailbox account, you can’t recreate the file either. In such situations, you can use a third-party tool such as Stellar Converter for OST to convert inaccessible OST to PST. This OST to PST Converter tool scans the OST file, converts it, and saves it in PST format, in just few simple steps. You can then import this file in Outlook by using the Import and Export Wizard.
To convert OST to PST by using Stellar Converter for OST software, follow these steps:
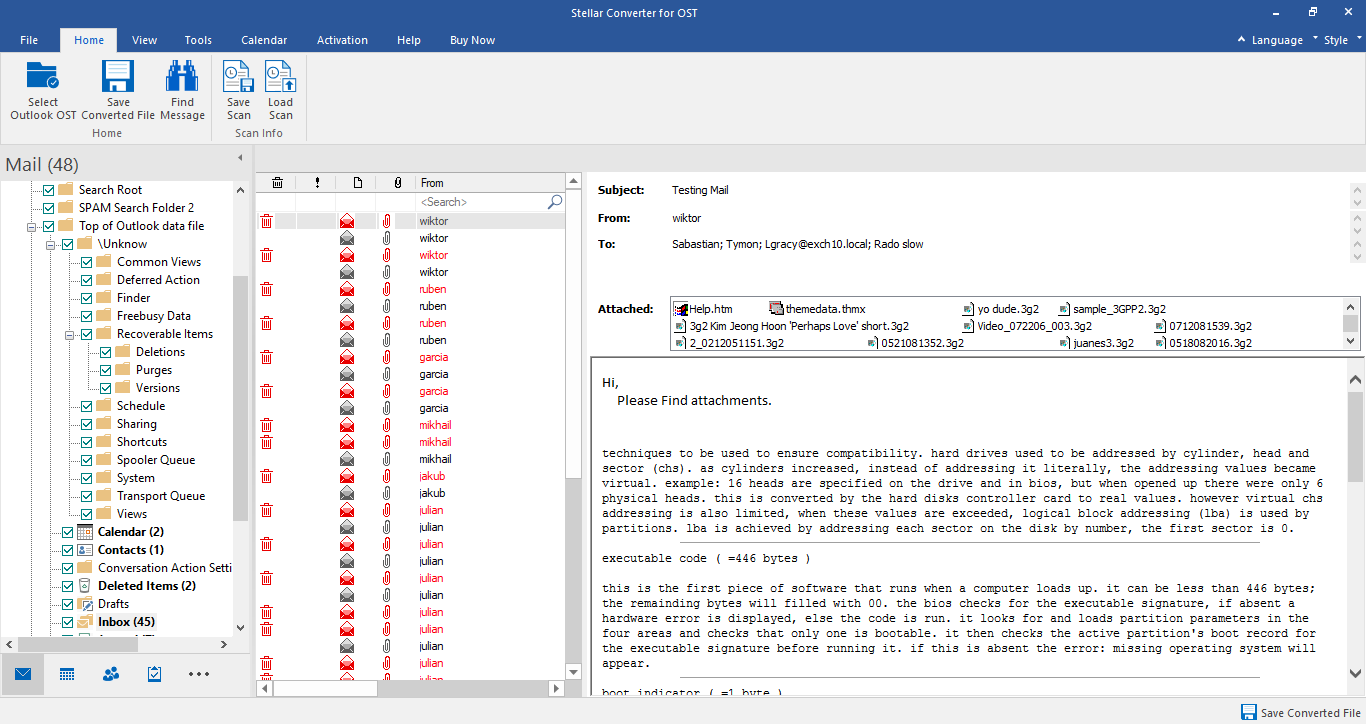
- Launch the software and provide the location of OST file. If you don’t know the location, use Find option. Then click Convert.
- Once the software has scanned the file, preview the file’s items and select the items you want to save in the PST file.
- In the Save As window, select PST format and the desired location to save the file.
- The PST will be saved at the desired location. You can then import it into Outlook.
Conclusion
Usually, you don’t require to change the default location of the OST file. However, at times, you need to change OST location in Outlook 2016 due to various reasons such as lack of storage space on hard drive, etc. To change the location of OST file, you can set ForceOSTPath or use Symbolic Links to relocate the file, as mentioned in this post. If the OST file is inaccessible or orphaned, you can convert it into PST by using an advanced OST to PST Converter tool and then import the data into Outlook.